Hey friends, I've been getting a lot of questions lately about how my animal earrings are made. So I decided to make a whole blog post about it. Hope this answers all your questions!

I design all the animals on my computer and print out sheets of them.

I rubber cement the animals to sterling silver, and drill tiny holes for the eyes and ears.
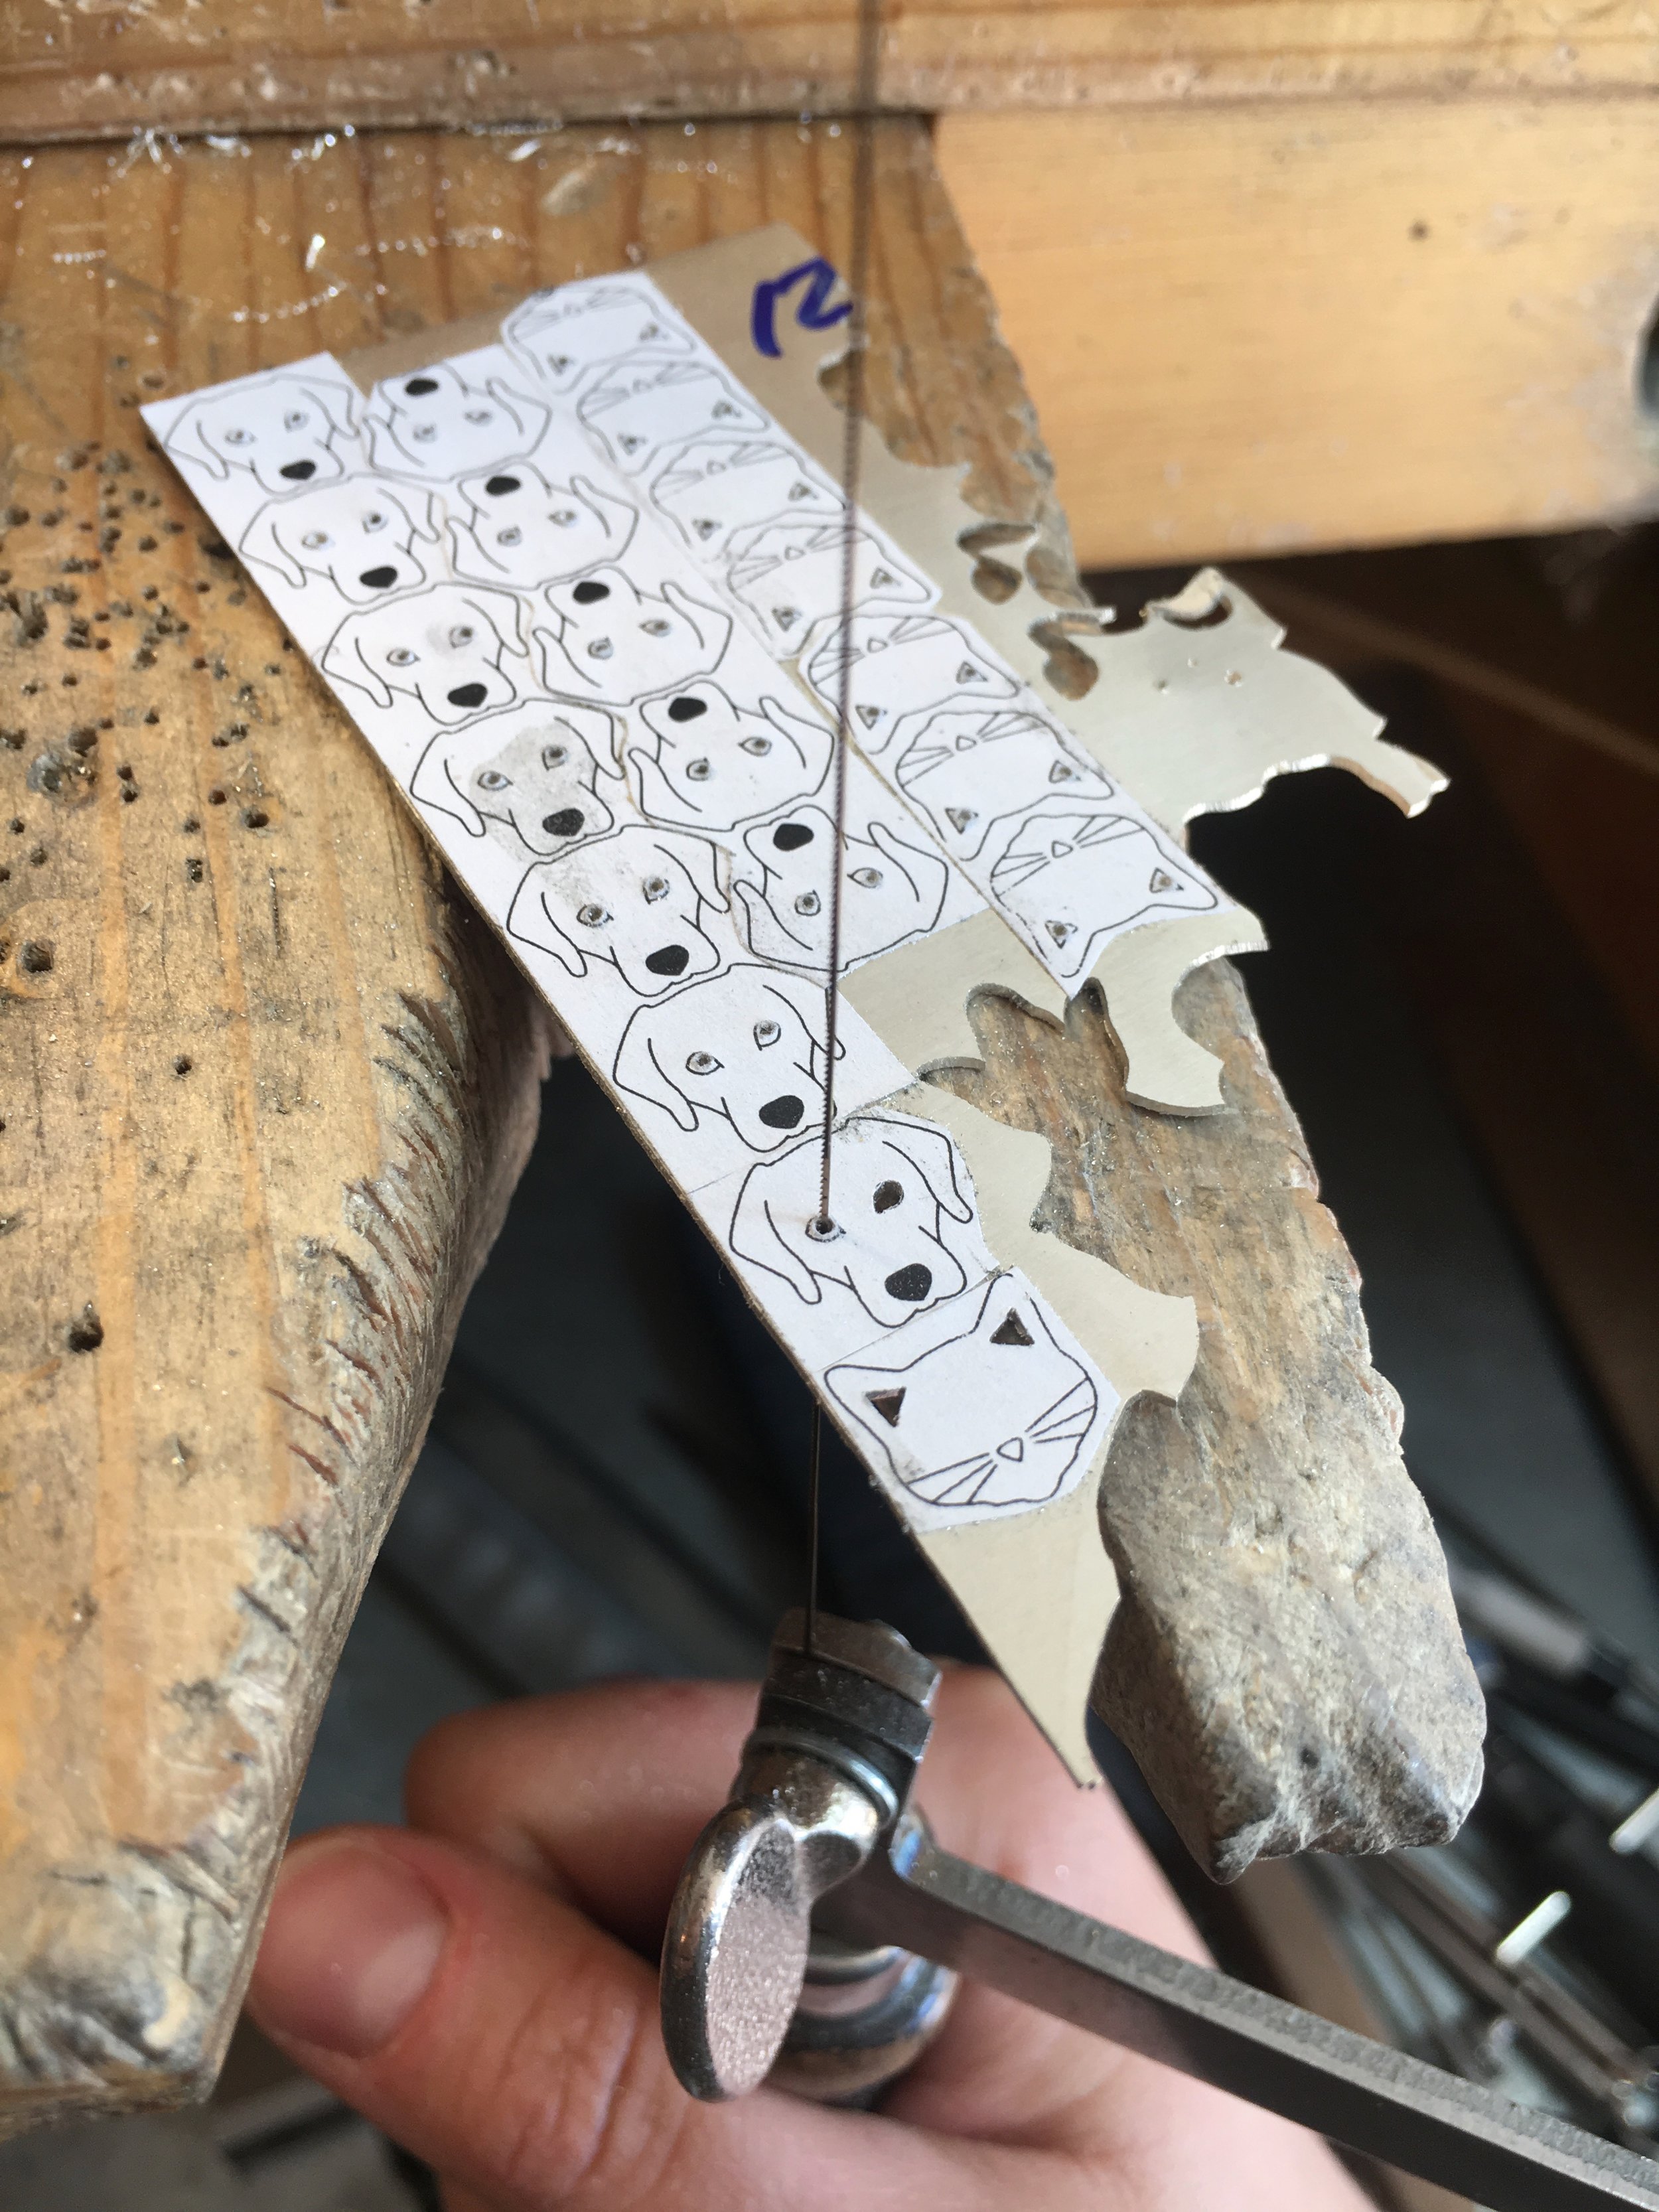
I cut out the eyes and ears by hand with my jewelers saw.

It's way easier to cut out the tiny pieces when they're still in a big sheet.

It's also easier to stamp on noses when they're all on the same sheet.
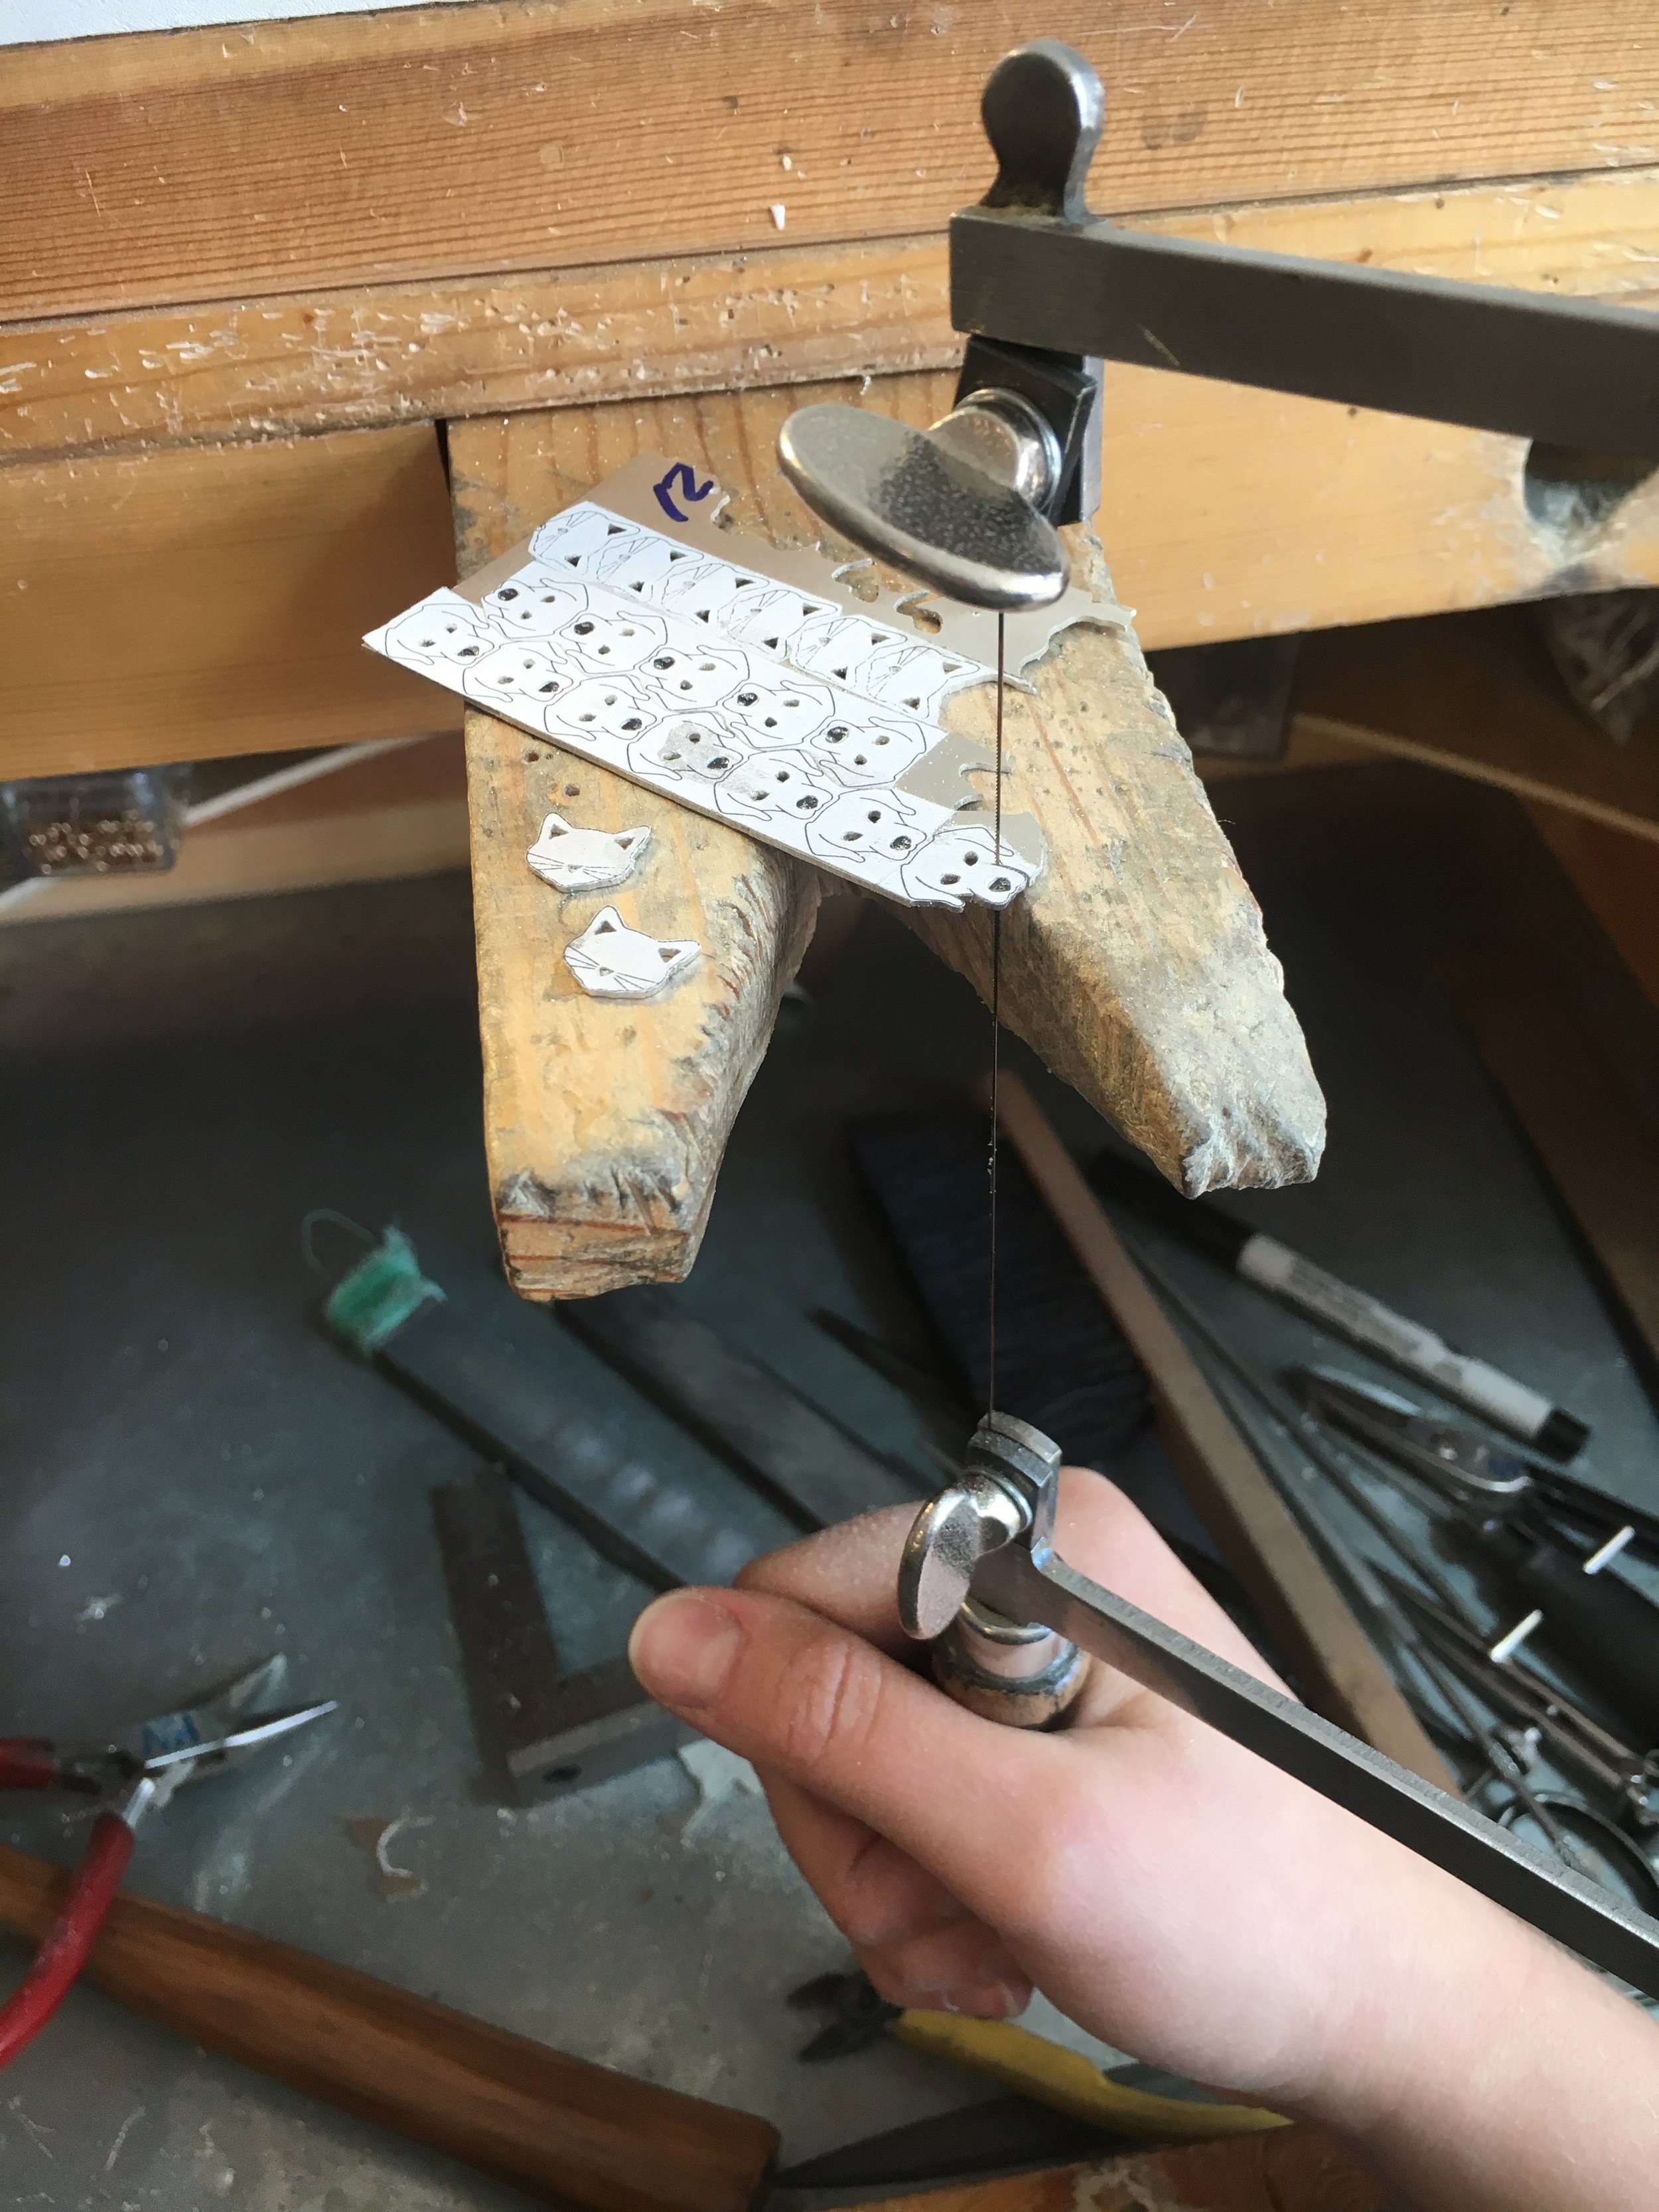
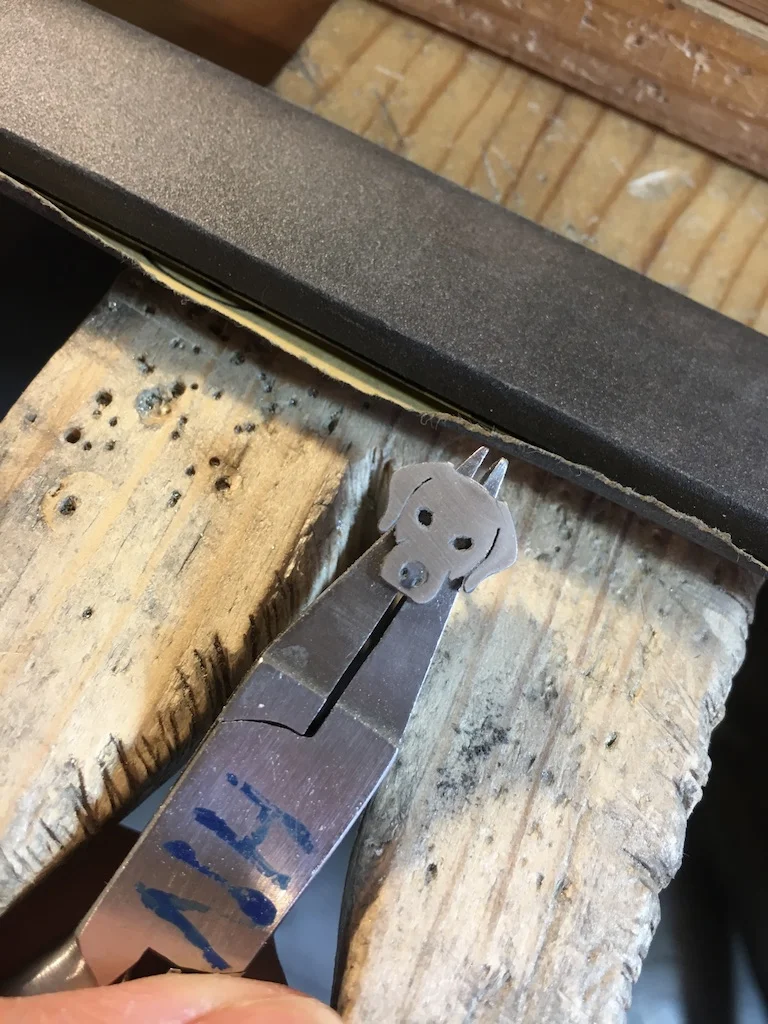
Then I cut out all the critters.
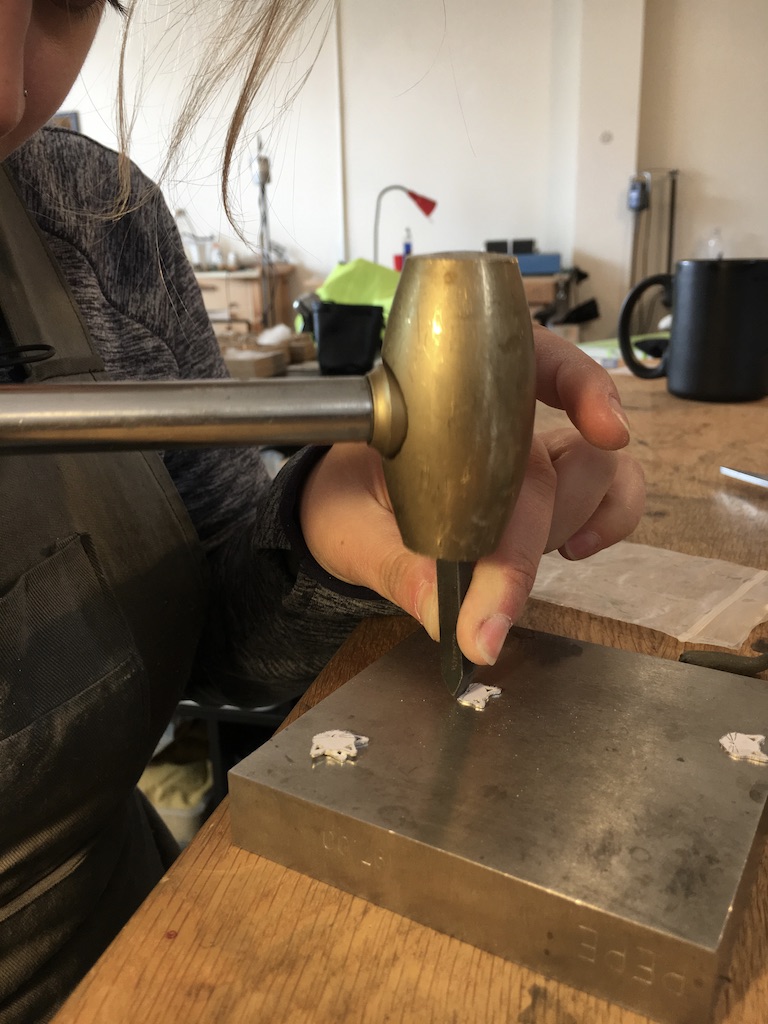
It's easier to stamp on whiskers after I cut them all out.

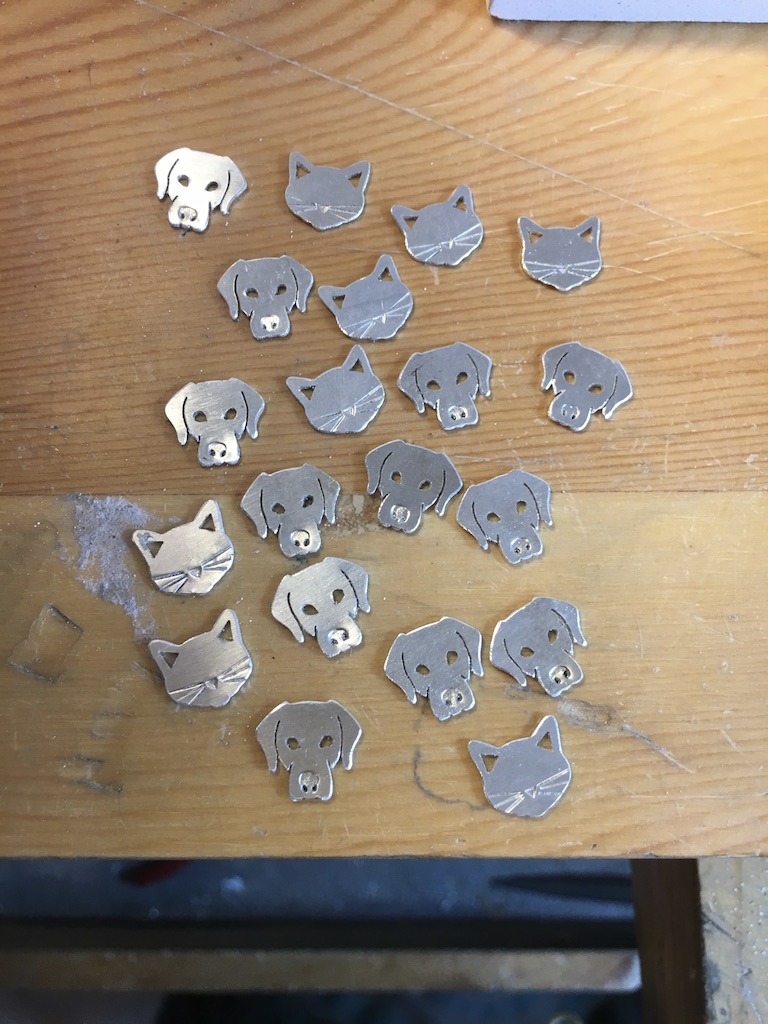
Noses and whiskers are all stamped! (Also, I made all my own stamps for these critters, so bonus points for me)
Next I file all the edges so they're not sharp and won't snag on your clothes or hair. Sorry I don't have an action shot of filing, but I promise it's not that exciting.
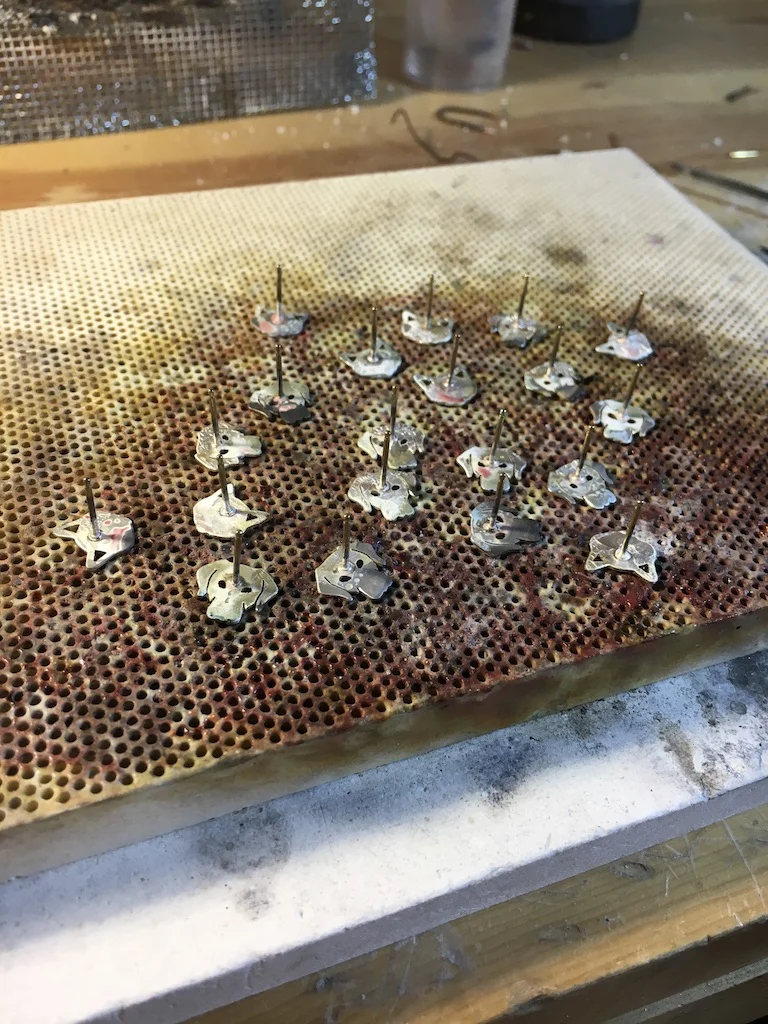
I solder all the earring posts to the back of the animals. Sorry I don't have an action shot of soldering. It's actually pretty exciting and it's my favorite part.

Then I clean off all the oxidation and flux from soldering in an acid solution called "pickle."

I darken them with a patina called "liver of sulphur" that works really well on silver.
Then I sand off all the patina that's not recessed in the stamped parts.

I tumble all the animals in my magnetic pin finisher. It makes them shiny super fast.
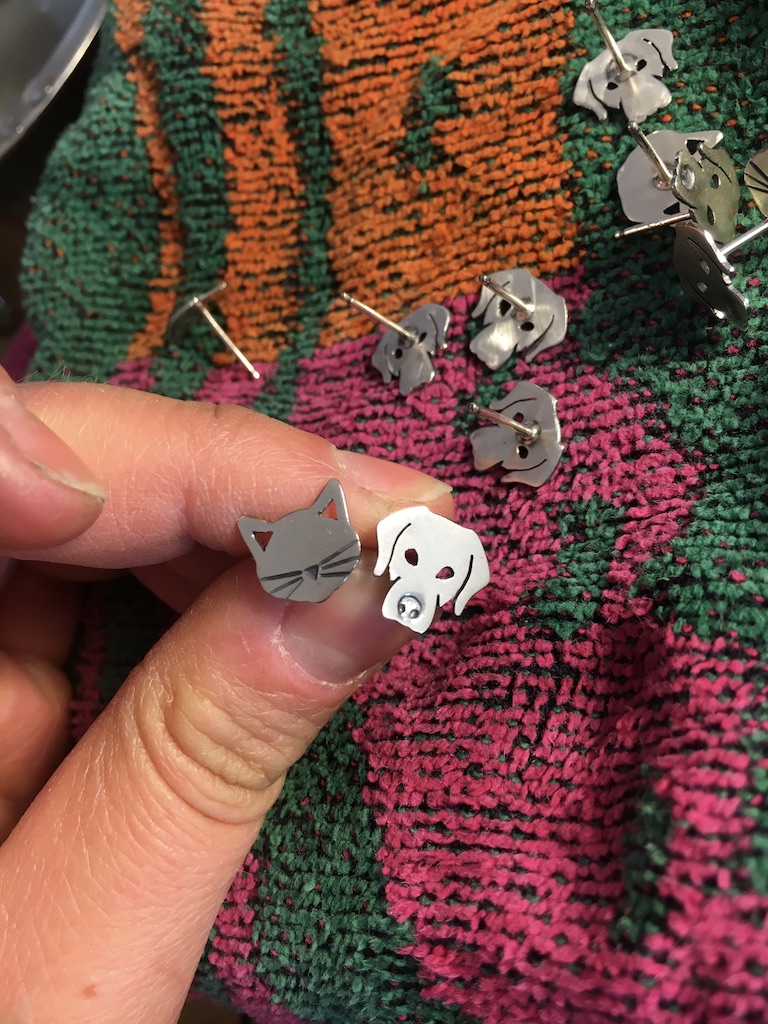
Nice and shiny after the tumbler.

🐶🐱🐶🐱🐶🐱🐶🐱🐶🐱

I put them on my earring cards. And yes, I did design and make the earring cards myself too.

And there you go! Animal earrings!
Thanks for going on that journey with me. I love making animal jewelry so much. If you love it too, check out all my little friends here.